Learn How to Draw Cartoon Kittens Step by Step, the most adorable cartoon animals. The goal of this lesson is not that you just draw a copy of the kitten that is displayed here, but that you create a very individual cartoon kitten of your own.
Consider my kitten to be just your guideline and customize all the parts you like. I recommend that you draw with a pencil so that you can erase some parts of the lines later.
Requirements :
- Graphite pencils of different grades: HB, B, 2B, 4B, 6B.
- A knead-eraser and a vinyl-eraser.
- Marker Pen and color pen
- A4 Paper (That’s the size I used. Of course you can draw on a bigger format. A smaller one is not recommended.)
How to Draw Cartoon Kittens Step by Step Guides
In the final step-by-step kittens drawing, you can draw over your pencil lines with a marker or ink fine liner pen, to make them strong and clear.
Step1: Draw Cartoon Head Kittens Outline

Start by drawing an outline of the whole body. First, you draw a circle for the kitten’s head. The line at the bottom marks how big the kitten will be, which is two and a half heights of the circle.
Step2: Draw Cartoon body Kittens Outline

The second circle for the body is just as big as the first one. Set it slightly to the left, because we are looking at the kitten from a side angle. Then add legs and tail as shown below.
Be aware that the feet in the front are sitting lower than the feet behind. This strengthens the 3D effect. Now that the body outline is finished we can get into the interesting details.
Step 3: Draw Kittens Cartoon The Snout

You can draw the kitten’s snout from the beginning like in the right picture below.
It just helped me to draw complete circles first and then erase the upper parts of them.
You should place the circles fairly low into the head. The left one is bigger than the right one, and the smaller one reaches out of the head a little bit.
In the next step, I chose to draw a heart for the nose, because I think that’s a cute cartoon effect. If you want your kitten to look a bit more realistic, add a triangle that points downwards instead.
Or draw the nose just as a simple circle, like a clown’s nose. It’s a cartoon animal, after all. So have fun and do what you like best!
When you have outlined the snout and drawn in the tongue you can add a lot of individual details.
Draw many little dots on the snout and add long whiskers, if you like.
Or how about adding some teeth? Just draw in a couple of triangles that reach out from the circles. I left everything empty and simple because that gives the kitten a “baby-look”, in my opinion.
Step 4: Draw Kittens Cartoon Eyes

When you draw in the eyes, as shown below, note that the upper eyelids could be connected as if they lie on the same arched line.
Because we look at the head from a side angle, one eye is broader than the other, but they still have largely the same height.
The interior of the eyes contains three circles. The first and largest one is for the colored iris, the second one is for the black pupil, and the third and smallest one is for a white highlight.
I just made the pupil big and round, but you can draw in the pupil as a triangle or a thin oval for example.
Usually cat’s eyes look like that during daylight, and the pupil only becomes a circle when it is very dark.
Step 5: Draw The Kittens Cartoon Ears
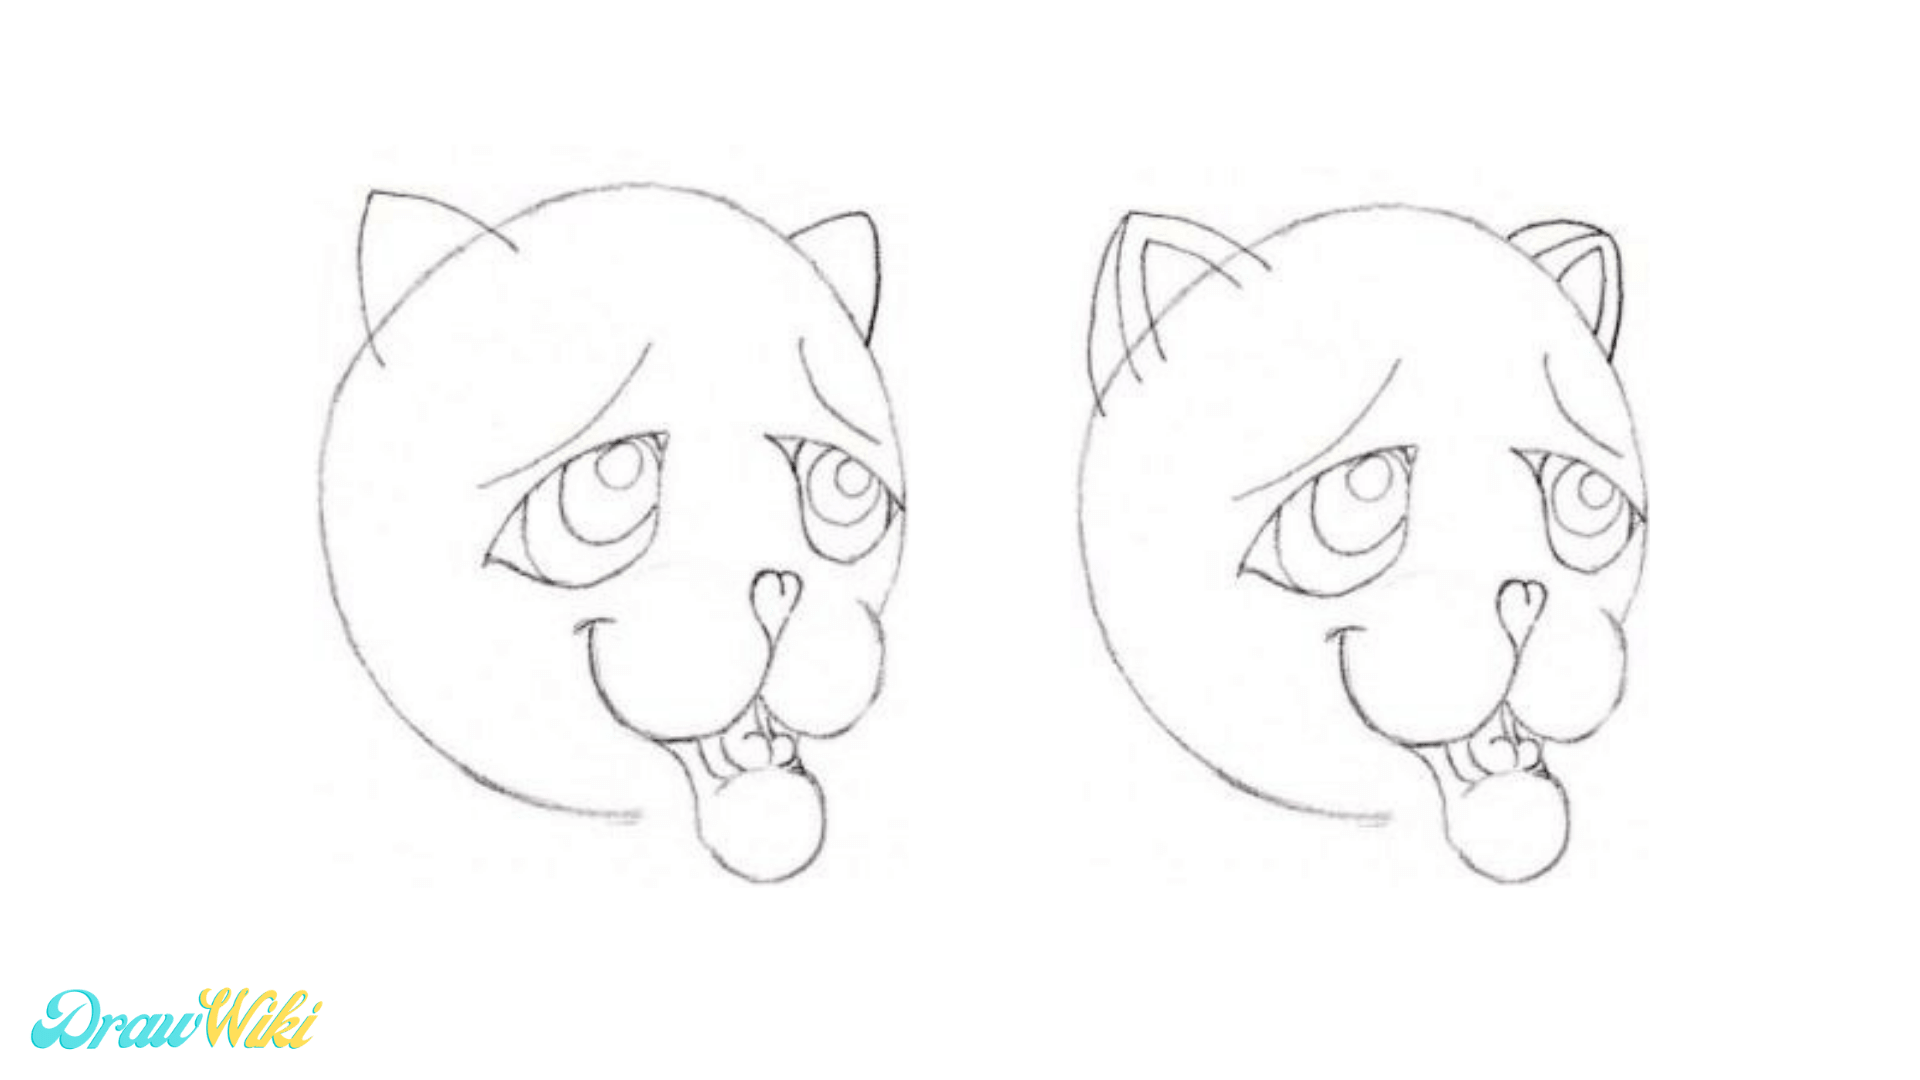
Let the lines for the kitten’s right ear (left in the picture) cut into the head’s circle, but let the lines for the other ear end, as soon as they touch the circle.
This enhances the 3D effect. One ear looks like it is more in the front and the other like it’s farther behind.
Make the ears as big as you consider appropriate. I made them rather small and rounded, but any triangle-shape will do. Consider to add many little hairs in the ears and on top of them, if you like.
Step 6: Draw The Kittens Cartoon Hair

Now customize your kitten’s head further. You can add a bit of hair between the ears, just like I did. It’s just a couple of curved spikes. And how about drawing in eyelashes?
If you want your kitten to look girly, that would be a great idea.
The Head is finished now, and your kitten almost complete.
All that’s left are the feet.
Step 7: Draw The Kittens Cartoon Feet Details

This is what the feet look like right now. Draw in three toes into each form and erase a little where necessary. Note that on the right feet (left in the picture) you see all toes from the front.
That’s why they don’t overlap each other. But since you see the left feet a little bit from the side, the toes overlap each other slightly. Consider adding a claw to each toe.
I just feel too much pity for my furniture to do that.
Step 8: Draw The Kittens Cartoon Fur Pattern, Inking, And Coloring

All the body parts of your kitten are ready now. Yet you can bring the fur a bit more alive. I added a rounded shape to the belly to make it more interesting. But you can add whatever pattern you like best.
How about making it a tiger kitten and drawing in many zigzag lines all across body and legs? Consider making the tail a bit more bushy and hairy by adding some curved spikes to it, just like between the ears. Or don’t draw in anything at all and leave the fur clean and simple, just as you prefer.