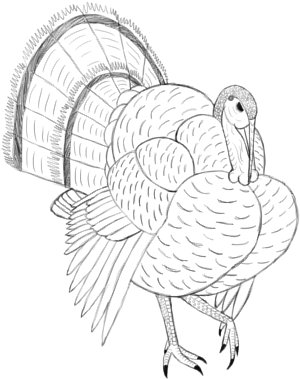
Hey, are you finding a turkey drawing tutorial? Then you are in the right place. In this, “How to Draw a Turkey” post I am showing the best and easy way to draw for everyone.
A turkey is just as fat as he is fascinating? With his pretty dress of feathers, he is an image of pride and high self-esteem.
Did you know that Benjamin Franklin would have preferred the turkey as the national bird for the USA over the bald eagle?
He considered the bald eagle to be a coward because he led much smaller birds to drive him out of his territory.
In his opinion, the turkey, although he was a little bit vain and silly, was a much braver bird.
Whether you agree with Franklin or not, a turkey is certainly an interesting drawing subject. So let’s get started to bring this famous bird on our paper.
How to Draw a Turkey Step by Step
This is a simple How to Draw a Turkey step-by-step tutorial mainly I am focused on beginners. So it’s best for everyone.
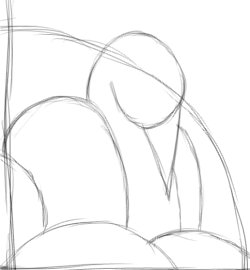
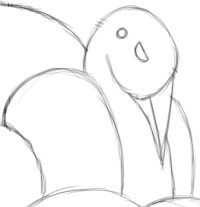
Step 1: Torso and Wing
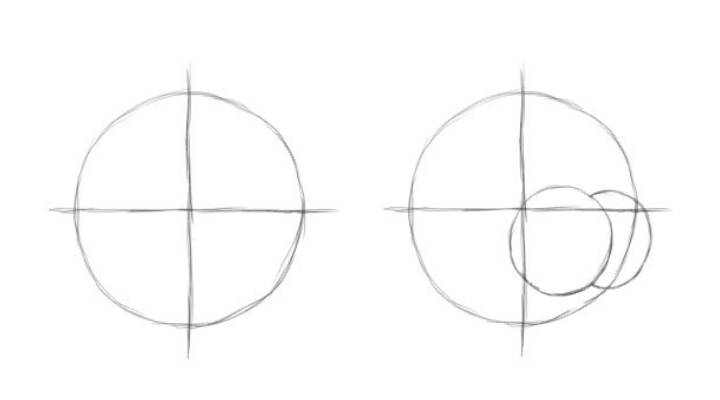
Alright, draw a big circle with two middle axes on your paper.
This circle will help us to draw the turkey well proportioned.
In the end, the turkey will occupy almost the entire circle, and reach a bit beyond it at the left and at the bottom.
Now we begin drawing the turkey itself with two overlapping circles for its swollen breast. Observe where these circles cut the axes, to place them correctly and give them the right size.
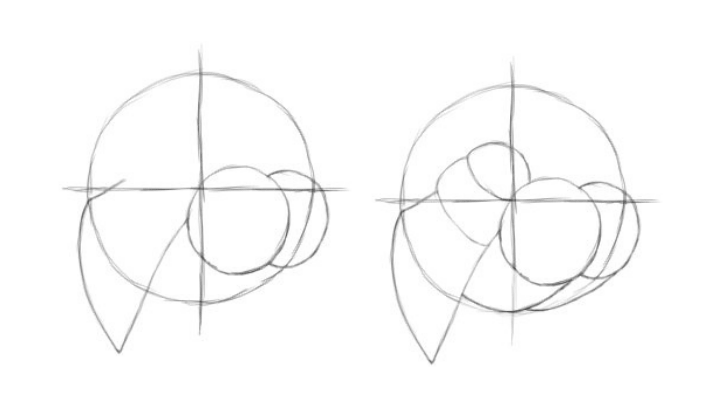
Draw two separate segments above the lower wing now.
The first segment is the wing’s upper part, which has shorter feathers. The second segment is the shoulder. It is a bit smaller and rounded at the top.
Use the axes for your orientation again, to estimate the size of these parts.
Additionally, draw two curved lines going down from the breast so that they form the belly. Let them touch the big circle at the bottom.
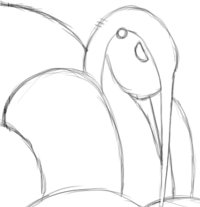
Step 2: Basic Head Shape
Now it’s time to draw the head with the two feather bulges beside it.
Begin with one big bulge that touches the shoulder and chest.
Then draw the head beside it, reaching a bit beyond the large circle. Attach a simple triangle for the beak to it. Then add another bulge on the other side of the head. Make it very thin, because it is largely covered by the neck.
(The right picture is just a close up for better visibility.)
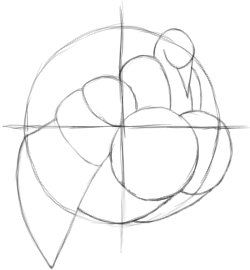
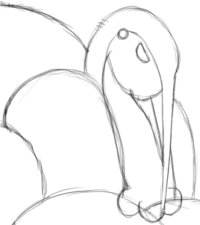
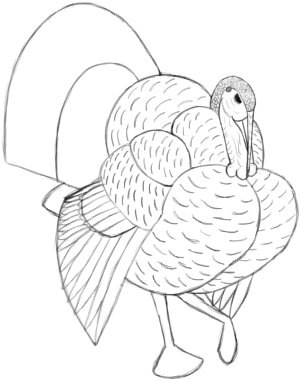
Step3: Back and Tail

Draw one big curve on the turkey’s back.
Let it start at the back of the head, go up to touch the circle’s top in the left half, and then curve down to the upper wing segment.
Its shape is pretty much a semi-circle.
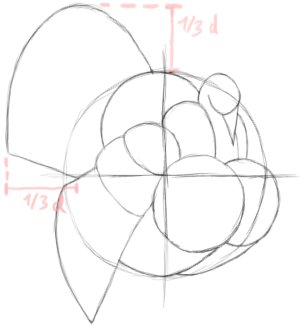
And now we can add the turkey’s pride: his big and broad tail, which he carries almost like a peacock.
Its height and breadth in the drawing is about a third of the circle’s diameter, as the red lines indicate.
The difficulty here is to make its shape rather elliptical than circular.
Think of it as a cutout part from a circle that you see from a side angle,
or a slice of pizza.
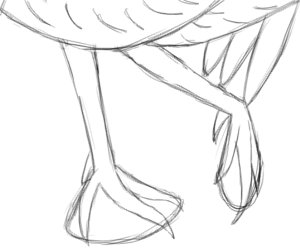
Step 4: Legs and Feet
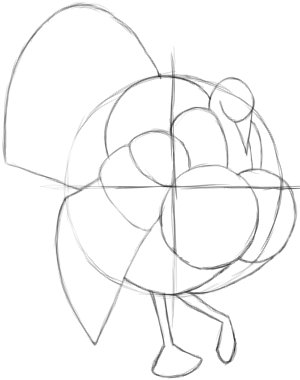
Let’s give legs to our turkey in this step.
Draw them reaching a bit below the wing, their size being slightly shorter than half of the circle’s diameter.
To make a cool impression, draw one leg standing on the ground, and the other one slightly lifted.
You can use simple “pizza slices” for feet, again.
Make the foot of the left leg very narrow, because it is seen from a strong side angle.
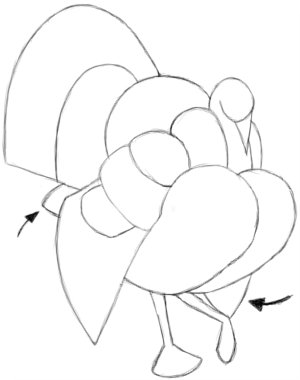
Alright, carefully erase the big circle and its axes now, since we’re done with it.
Also remove the separation between breast and belly, so that you have two huge, connected shapes.
Having done that, we’re ready to add the last few body parts.
The arrows are pointing them out:
Add a small piece of tail that is visible at the hind end, and a small piece of the second wing, which sticks out at the belly’s side.
And with that, our turkey is standing in full figure!
All that’s left to do is a bit of detailing.
So let’s start right away, by adding a new segment at the top of the lower wing, and drawing a curved line across the tail.
Step 5: Head Details
Sketch in an eye as a semi-circle, a small circle for the ear behind it, and a line that separates the beak into two parts (the lower one being smaller).
Draw a smoothly curved line that runs across neck and head. Let it go all the way to the beak, and turn it into the snood there, which is dangling down, reaching lower than the beak.
A turkey has thick, red wattles on this throat. Place three of them on top of the chest.
Also change the left side of the neck a bit, cutting off a small part of the feather bulge beside it.
Then erase all lines which are covered by wattles and neck now.
Fill the head’s upper part by quickly scribbling in a lot of tiny circles.
Then fill the eye with black, and draw a few curved lines below it into the face for folds in the skin.
Add a row of little curves along the side of the throat and on the snood, and then sprinkle in a few longer curved lines on the throat.
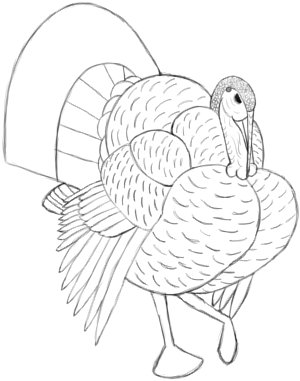
Step 6: Small Feathers
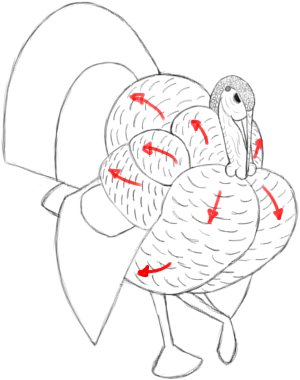
To fill the turkey with feathers is a fairly simple task.
Just cover all these blown up feather bulges with small, curved lines that flow into the arrows’ direction.
We create a nice texture that way
Step 7: Big Feathers
To draw the larger feathers on the wings is no big deal either.
Each feather consists of two simple lines, which meet each other in the tip.
First, draw a row of shorter feathers into the separated segment at the top of the lower wing.
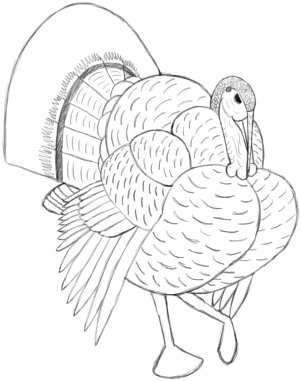
Afterward, you can fill in the large feathers. Make them smaller and smaller the further back on the wing you go.
Also, draw in a few feathers on the wing of the other side.
Erase the border lines of the wings in the end, so that only the feathers remain.
Step 8: Tail Details
Let’s not forget the smaller tail feathers which are visible below the large tail wheel. Also use a few lines to separate them from one another.
Now let’s detail the tail feathers.
Draw a narrow zigzag pattern along the top of the feathers, as well as a black stripe below it.
Then fill each feather with a row of curved lines.
Do the same thing with the upper part of the tail now.
First separate it with a couple of straight lines, draw zigzag pattern and black stripes along the top, and then fill the single feathers with curved lines.
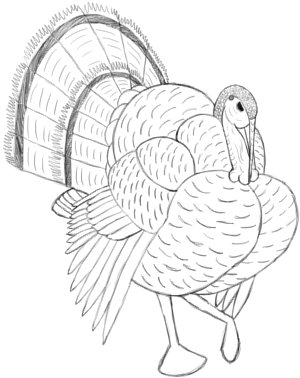
Step 9: Legs and Feet Details
A turkey has three toes and a small claw at the foot’s backside.
Make the toe in the middle the longest and the other two a bit shorter.
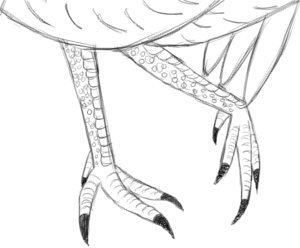
Fill in the tip of each toe with black, so that you get claws.
Then draw a row of square shapes along the front side of each leg, and fill the area behind it with small circles.
Finally, draw a row of small curves across each toe, and your turkey is finished.
You can also read :