Welcome to my new artist or a fashion designer. My name is suban Kundu. I have more than 10 years of drawing experience. I’m sharing my drawing experience with you by this drawwiki.com. Do you want to know How to draw a collar? Then it’s the right place for you. In this tutorial, I show you steps by steps How to drawn collars.
You can read this: 16 Easy Steps How To Draw a Key for the Fresh Artist
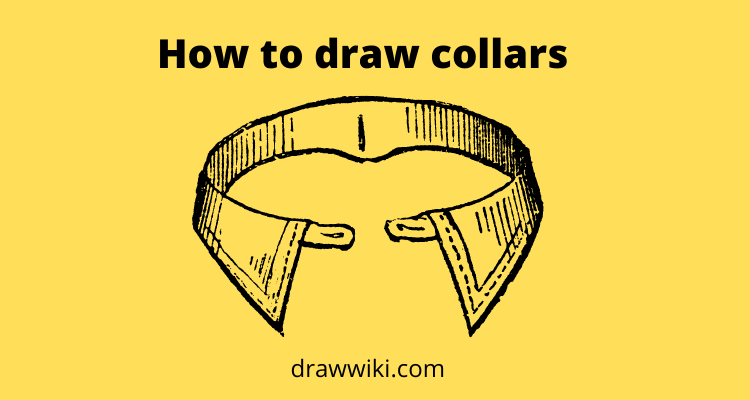
With this website, you can learn how to draw collars and many other drawing tutorials.
After following all the steps, I guarantee you can easily draw a collar.
Basic Requirements :
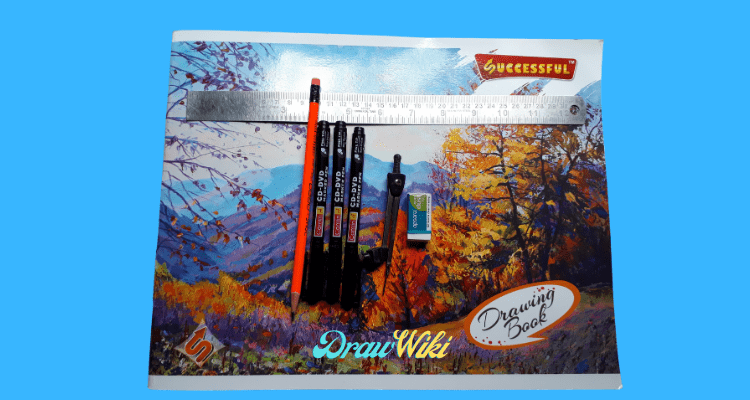
Before going into collar drawing tutorials collect out some basic tools needed below.
- Pencil (Recommended 2B pencil)
- marker
- eraser or rubber
- White paper(using good quality paper)
- compass
- Scale
However, you can simply draw a collar using a pencil or marker and paper. I have focused this tutorial on new artists. So I’m trying to show you an easy way to draw a collar. I have seen all my drawing tools for these collar drawing tutorials in the image below.
How to draw collars steps by steps tutorials
I hope you are collected all required tools. So we can go to collar drawing tutorial.
Step 1:
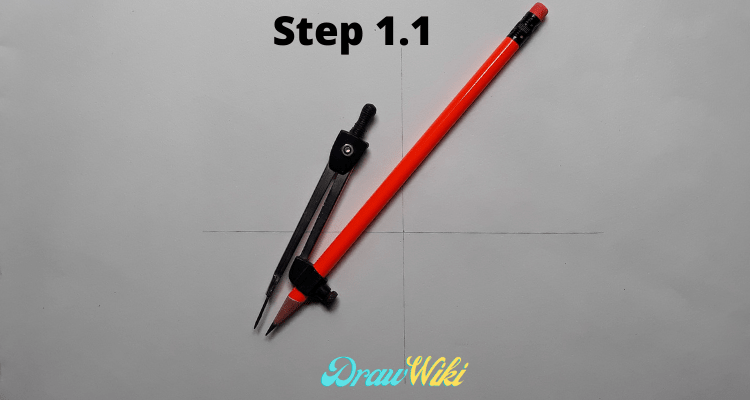
Open your sketch book or pickup a paper and hold on pencil on the hand.

Draw a horizontal line using any scale. Make sure all lines draw lightly because in the future we erase this line. Dark lines can be damaged your paper when it removes. So all pencil lines always draw lightly.
I am drawing my horizontal line 15 cm. You can draw any size as you required. Then divided this line in equal portion and mark the middle point. My case’s 7.5 cm because my line length is 15 cm.
Next, draw a vertical line on this point. The vertical line length not fixed but this line draws as your requirement. So guys number one steps is complete.
Step 2:
Now time to using a compass. Set up a compass with a pencil. Marked two points on the vertical line on the upper side. One point to point the distance as your requirement. Your collar height between these two heights.
Mark a point on the lower side of the vertical line. Through the help of this point draw an arc to the first point on the upper side vertical line. Next, draw another arc on the second point of the vertical line. I am showing how looks like this arc.

Step 3:
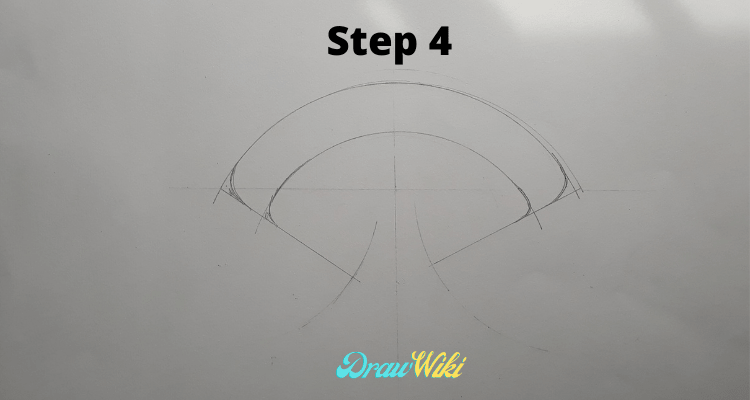
Draw two arcs with equal distance from the outmost arc coincide in a horizontal line. Next steps you drew a straight line with an equal degree, like 45 degrees.

Step 4:
Draw this carves such as me in both side of arc. Then joint to the straight line.
Step 5:
In this step draw two inclined lines. Draw another straight line for the joint endpoint of the inclined lines.
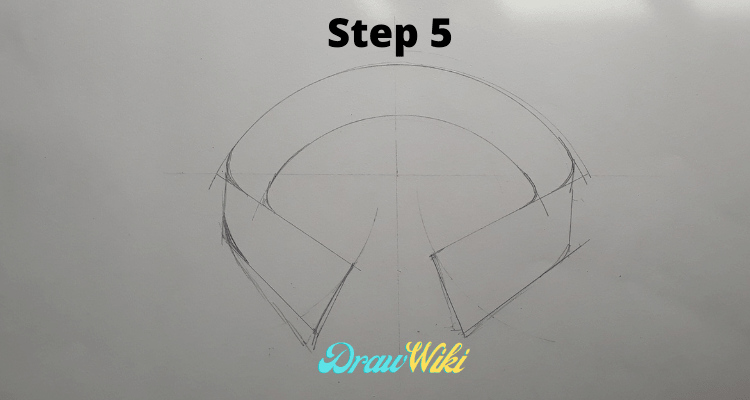
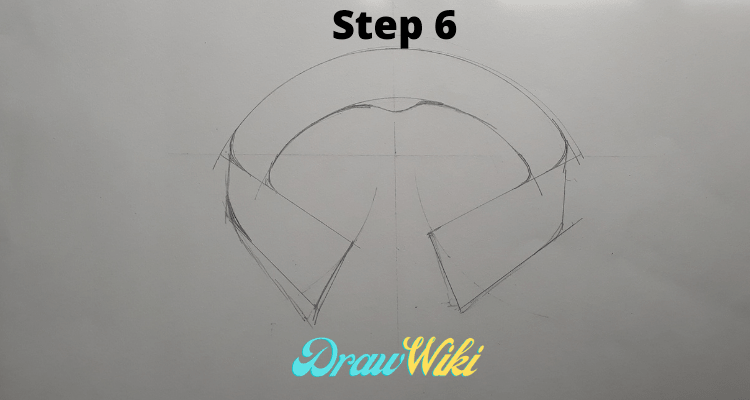
Step 6:
Step 6 draw small inner arc. I am showing how you can draw. You follow my image.
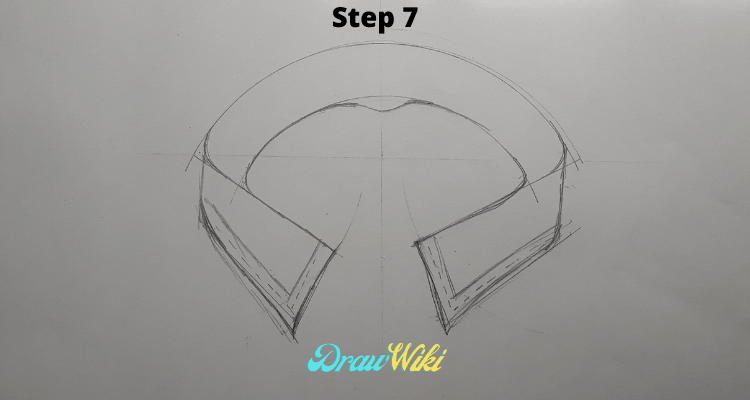
Step 7:
Draw two inner lines and dotted lines like in my image. This is the border of the shirt collar. In this step complete our all necessary collar drawing outline. Next steps we draw this outline by a marker pen. So let’s go the next steps.
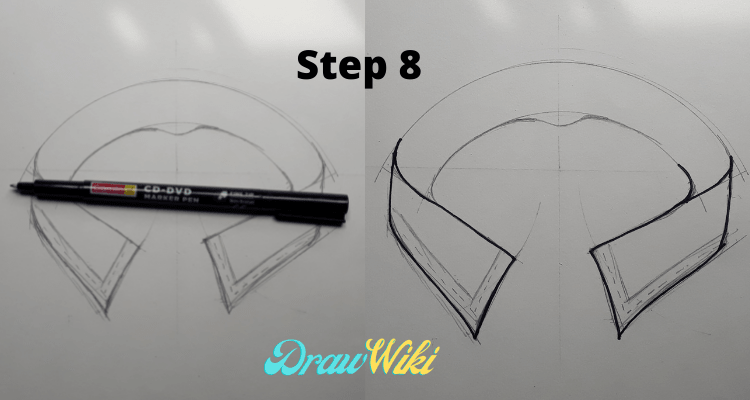
Step 8:
Below I am showing two pictures in one window. Similar to draw this outline in my right-hand side collar. Draw all out by the marker pen. Draw all lines with the dotted line. When you will be complete all outlines. The final shape of your collar drawing is finished.
Step 9:
Now we will be removing all the pencil lines with the help of the rubber. I am using apsara non-dust erasure. It’s a very good quality erase at a cheap price. This erases cost around $0.04. Your final drawing completed. Just only need detailing work.

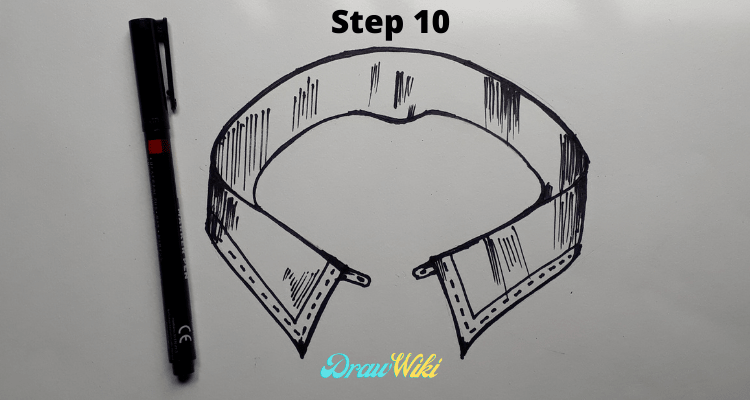
Step 10:
Let’s going to detailing and skating work. Draw the collar button section. Which I forgot. Now our all skating work is completed. Now your final artwork is ready. You learned how to draw collars through the top 10 easy steps
Final Words:
I have created these drawing tutorials for beginners and intermediate students, so I have shown you these 10 easy steps. But if you are an expert, you can draw a marked pen directly.
Do you like my tutorial? You can share it with your friends and family. For any mistakes please comment below.