The penguin is a very peculiar bird.
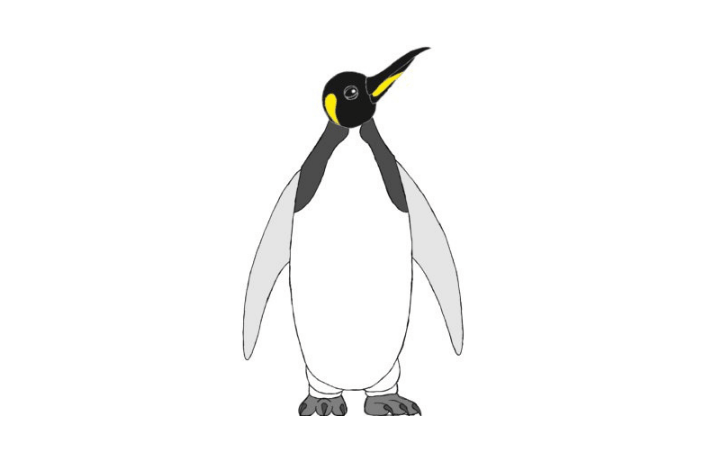
It doesn’t fly but is an excellent swimmer instead.
Its feathers are so short and dense that they look like fur.
Some penguins can stay underwater for more than 15 minutes in a row without breathing and dive as deep as 500 meters, which is a mystery modern science hasn’t been able to explain yet!
So let’s draw one of these strange and cute fellows!
Step 1: Basic Shapes
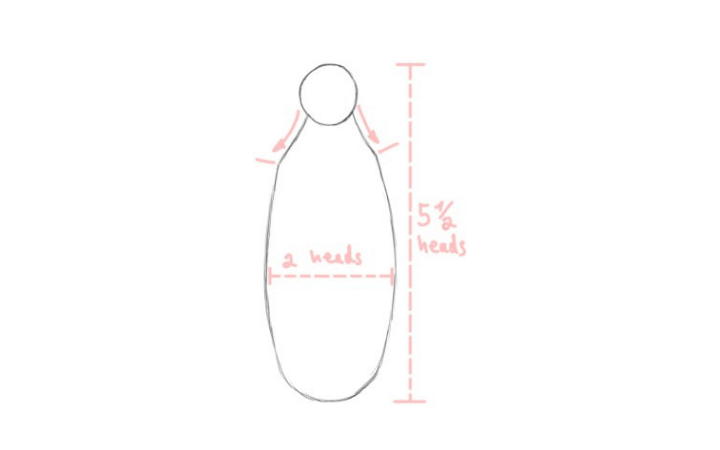
Draw a circle for the penguin’s head, first.
(We’ll use the size of this circle to measure out the rest of the body.)
Then draw two lines running down from the head to the shoulders.
Below them, the body has just the shape of a big oval.
When you draw it in, take care to make it so big that two heads would fit in the middle, and the entire penguin is five and a half heads high.
It’s five and a half because we’ll later add the feet and end up with a height of six heads in total.
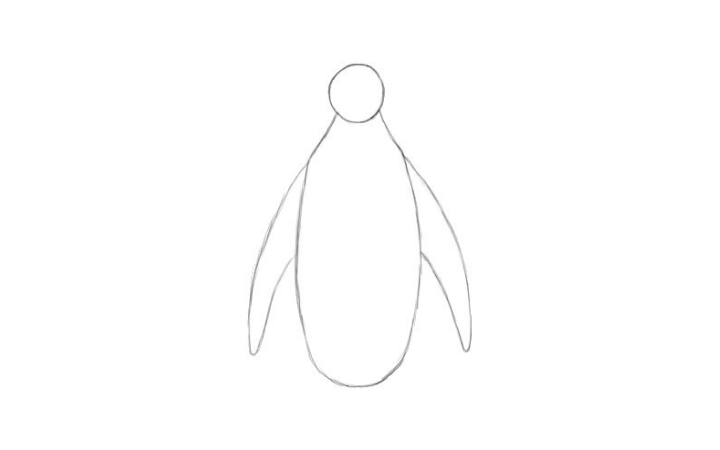
Now add the penguin’s wings, or should I say flippers?
Draw them as two shapes that start just below the shoulders and hang down in two slight curves, becoming thinner and thinner towards their tips.
They stop a bit above the oval shape’s bottom.

The penguin’s legs are very short.
Start drawing them with a semi-circle on each side, and then place a thin fold below it.
Keep the feet very simple for now.
Attach them to the legs and let them become broader towards the ground. One foot is pointing directly towards us, while the other one is pointing to the side. Make the second one a bit longer for that reason.
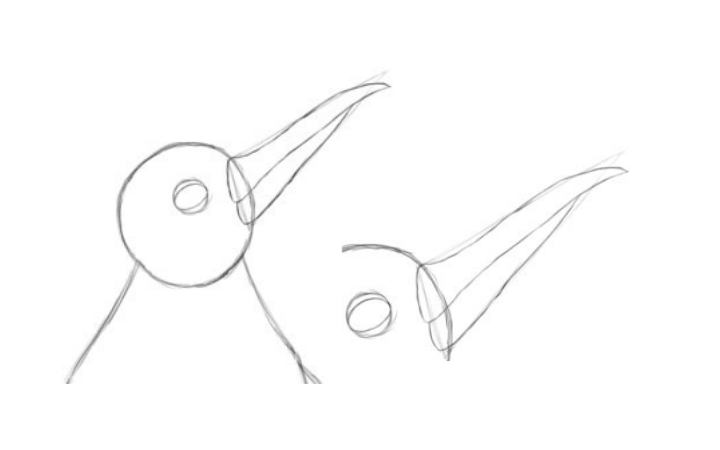
Step 2: Head Details
Add a long, thin triangle and a circle to the penguin’s head for eye and beak. Make the beak a bit longer than the head’s diameter.
You can let it point in other directions, but I thought a look towards the upper right would be kinda dramatic.
Now let’s add some details to the eye and beak.
Draw two curves along the top and bottom of the circle to create eyelids.
Do this in such a way that the eye lies diagonally. You can see this when you look at the eye corners. The one closer to the beak is sitting higher than the other one.
Also draw in a detailed shape for the beak. The uppermost line is long and s-shaped. At the end it points down a bit.
At beginning of upper and lower beak the lines are slightly rounded.

Carefully erase the triangle, so that only the beak remains.
Add two more small details to the eye.
Draw another line very close along the top of the lower eyelid.
Look on the close-up picture to see it.
And add a small circle that looks in direction of the beak, into the eye.
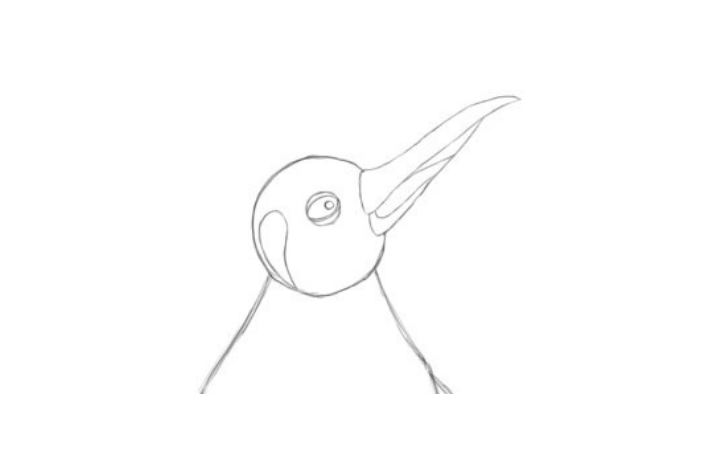
It’s time for fancy penguin decoration!
Draw a big drop-shape on the head’s hind end, and another one on the lower beak.
When you color your penguin these parts will be yellow, or orange.
Step 3: Coat and Feet
Separate two curvy areas around the shoulders for a pretty suit.
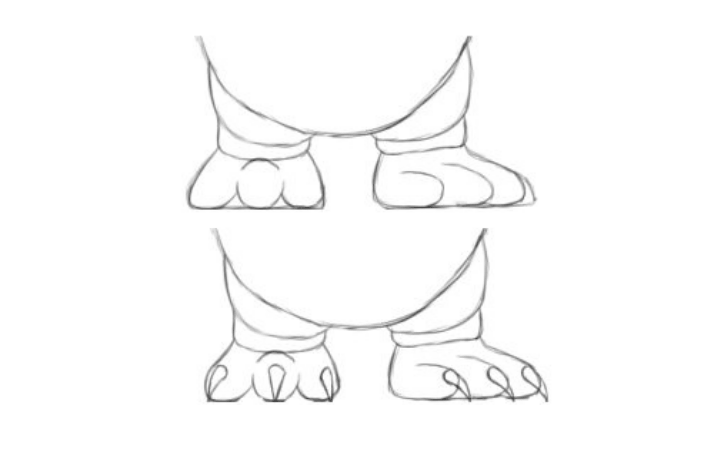
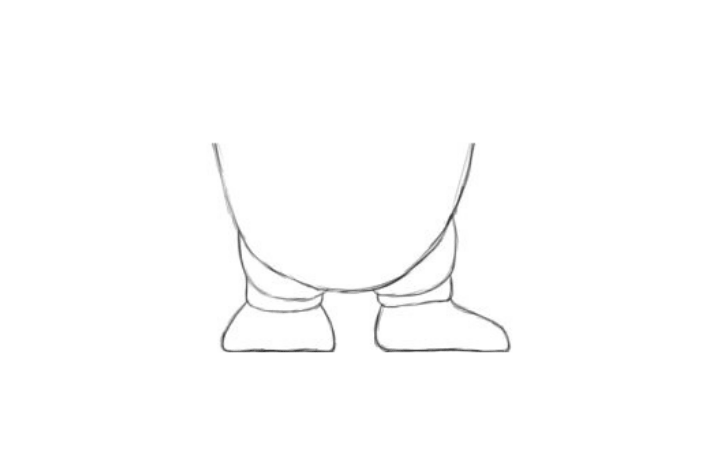
The feet of the penguin have three toes each.
First, draw in the single toes into each foot.
On the foot pointing towards us, the toe in the middle looks pretty much like a circle, and the others are short ovals.
On the other foot, however, you can draw the toes as ovals pointing towards the side.
Now add a simple claw to the top of each toe, then erase the lines between the toes and lines that are covered by the claws now, and the feet are complete.
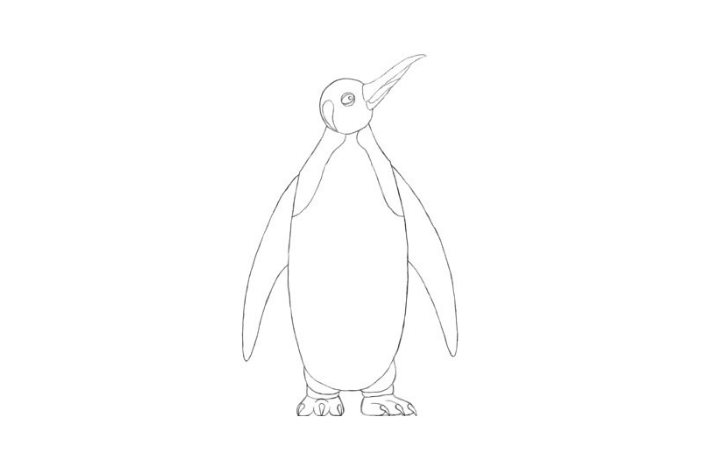
Now you can clean up the lines here and there and make minor corrections if something looks unfit.
But otherwise, your penguin is ready.
Ready to dive headfirst into the ocean and go fish-hunting.
I wish I could swim like that!
it was a good drawing