If you are looking for a tutorial on how to draw a dog with the help of a pencil. Then you have reached the right place.
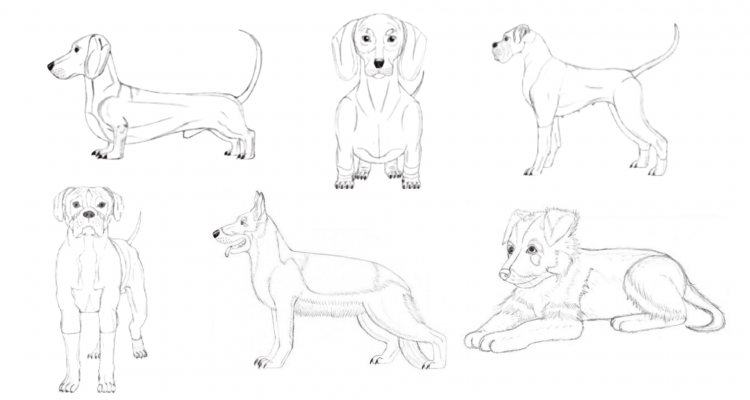
because, in this tutorial, I am showing how you can draw three different types of dogs. First, we draw German Shepherd Dog, second Dachshund and the third is Boxer dog.
What you need:
I have used some tools in this drawing. I have provided a list for you to use in this tutorial. You can use drawing tools of your choice if you want. But be sure to let us know in the comments the tools you use
- Graphite pencils of different grades: HB, B, 2B, 4B, 6B.
- A knead-eraser and a vinyl-eraser.
- Paper
- Ruler
So guys let’s go into German shepherd dog drawing
How To Draw German shepherd dog
German shepherd dog is one the common dog. Everyone loves this dog. So I will first show you how to draw a German Shepherd dog step by step.
Step 1: Draw Proportional Outline
First, we are going to create a couple of rectangles to map out the dog’s proportions. Have a ruler at hand to do that.
Then we’ll draw the dog into this proportional outline.
Got that ruler? Great, let’s start.
Draw the squares and rectangles very faintly because we’ll erase all of them again later on.
Draw a big rectangle on your paper which’s height is three-fourths of its width. Then divide this rectangle in half with a horizontal line.
On the top left of the big rectangle, you draw a small square that has a side length of one-fourth of the big rectangle’s width.
Add another square of the same size left to it.
The proportional outline is now complete and will help us to draw the body parts of the German shepherd dog in the right size.
So let’s start to draw in the dog.
Step 2 :Draw Body Outline

Take note of all the points where the lines are touching the edges of the squares.
At the very right, the neck begins at the corner of the square.
The line goes up all the way to the square’s top and touches it close to the middle line. On the other side, it goes down the dog’s forehead. Make a clearly visible step between forehead and snout.
Let the nose touch the left side of the square just slightly below the middle. Then draw in the mouth opening, the thin lower jaw, and finally let the line go down the throat and blend with the side of the rectangle.
The back of the German shepherd dog continues where the neck ended, at the corner of the square.
Let it slope down evenly at the beginning, but stronger at the hind end.
The dog’s chest begins to curve away from the left side in the middle of the upper rectangle. Draw the belly reaching slightly below the horizontal middle line, and let it end about a fourth before the rectangle’s right edge.

Step 3: Draw the legs
I recommend that you first draw the leg in the foreground, and then draw the second leg behind it as a copy of the first one. You just place it a bit higher and more to the left.
The front legs are rather thin. Let them go straight done at the beginning. In the lower half, there is a change in direction and they point slightly forward. Draw in the paw at the end with just two visible toes.
The hind leg is pretty thick at the top and rounded. It curves smoothly to the ankle, from where it goes straight down. The ankle lies pretty much in the middle of the lower rectangle’s height.
Draw the second hind leg at a rather large distance from the first one. Don’t let it stand straight, but make it slightly diagonal towards the end.
Then draw in the tail hanging down between the hind legs.
This is what your dog should roughly look like right now.
Make corrections if necessary, and then we move on to the next section where we start drawing in details.
Step 4: Draw Dog Head Details
Add the eye as a triangle with a slightly curved left side into the head.
Place it on the level of the step between snout and forehead.
Then separate the nose from the snout with a curved line. Draw the shepherd dog’s tongue hanging out of the mouth, and then attach the ears to the head’s top. Their basic shape is triangular, but take your time to draw in little irregularities to make them look more natural.
Draw in a black nostril into the nose, a pupil with the surrounding iris into the eye, and a couple of teeth into the mouth.
Then draw a line into each ear that separates the backside from the inside.
And now it’s time that we start to bring out the fur patterns. Use short fuzzy pencil strokes to achieve a furry effect.
Draw a frame around the mouth that starts at the snout’s top. Then draw a jagged connection from this frame’s upper side to the ear.
From behind the ear, the row of thin strokes goes downwards to the throat.
Outline a small spot of the fur above and below the eye. Also, draw a small line along the snout’s top, and make the back of the ears fuzzy with short pencil strokes.
Step 5: Draw Dog Fur Details

Make the edges of the legs fuzzy again with short pencil strokes, but do this only above the ankles.
Also, draw a bit of additional fur along the sides of the legs.
Below the ankles, you draw in a straight line along the edge of the front leg, and two lines on the hind leg to bring out the bone structure there.
Draw a couple of fuzzy lines into the tail and also make its edge furry. Finally, add a small claw to each toe. Now your dog is complete.
That was my way how to draw a german shepherd dog. I hope you liked it.
How to Draw a Dachshund Step by Step
Here we are going to draw a Dachshund dog from a proportional outline.
Have a ruler at hand to draw the squares and rectangles.

In the first part of this lesson, we’ll draw the dachshund from a side perspective, and in the second part, we’ll draw the dachshund from the front of view.
If you want to jump to the second part right away,
Otherwise, we start now with the side view drawing of the dachshund.
How to Draw a Dachshund Step by Step
Step 1 : Draw Side View Proportional Outline
First, we create a proportional outline into which we draw the dachshund later. This outline will help us to draw the body parts of the dachshund in the right size. Draw this outline very lightly, because we are going to erase it again.
Begin by drawing a large rectangle on your paper that is twice as broad as it is high (blue numbers). It will contain the dachshund’s torso.
Then separate the lowest fifth of this rectangle with a straight line from the rest. This section is reserved for the feet.
Add a smaller rectangle on the left top of the large one. Make it as broad as a fourth of the big rectangle’s width, and slightly higher than the half of the height of the big rectangle.
Attach another rectangle with the same size to its left, and you have completed the proportional outline.
These smaller rectangles will contain the dachshund’s head.
Now we can go ahead, and draw the dachshund into this structure.
How to Draw a Dachshund – 1.2: Torso Outline

It doesn’t really matter where you start to draw the body, but I begin to describe it at the throat (upper left).
You can just draw it after this picture, if you like, or read the long description below.
On the left side you can see a red mark. This lies one-fifth below the large rectangle’s top (same distance as the separation at the bottom).
The dachshund’s throat goes upwards from this mark and slightly towards the left.
Below the mark the chest begins. It bulges a bit forward and out of the rectangle, and then curves down to another red mark, where it touches the line. This second mark lies exactly below the right edge of the small rectangle for the head.
After this deepest point, the line goes upwards into the hind part of the large rectangle. Where it reaches the highest point, the distance between the body and the line below it is also about one fifth.
Behind this point the leg begins already. Draw the line curving down to form the dachshund’s knee, and then let it go down just behind the rectangle.
The dachshund’s back begins a bit to the left of the small rectangles right edge. It gently curves downwards, reaches its deepest point a bit behind the middle, and then goes slightly upwards again. At the hind end the line curves down and transitions into the leg. Let the dachshund’s heel stand out clearly there.
How to Draw a Dachshund – 1.3: Head Outline

Draw in the outline for the dachshund’s head into the small rectangles now. Look at the points where lines are touching or crossing the rectangles for your orientation.
The head touches the top in the left side of the right rectangle.
The left edge is touched by the snout about one third of the rectangle’s height above the bottom.
Let the step between snout and forehead stand out clearly.
How to Draw a Dachshund – 1.4: Legs & Feet Outline

To complete our dog’s shape we now draw in the front leg, the paw for the hind leg, and the tail.
Let the front leg cross the chest just in front of the chest’s deepest point.
Draw the tail reaching slightly higher than the dachshund’s head.
The feet are simple enough. You just draw in two small curves for the toes.
How to Draw a Dachshund – 1.5: Head Details

Separate the nose from the snout with a curved line around the snout’s tip.
Then draw in the eye as a triangle with a slightly curved left side. Place it on the level of the transition from snout to forehead.
Include the small mouth at the snout’s bottom, and then draw a huge ear into the right rectangle, covering most of the head there.
Let the ear point a bit towards the left.
Now you can erase all the rectangles, because we’re done with them.

Shade the dachshund’s nose, so that it’s largely black, but leave a white stripe free close to the top.
Then draw in a black oval into the eye for the pupil and add the narrow iris around it. Outline the eyelids with fine lines along the eye’s top and bottom.
Sketch in a line that starts at the nose and runs parallel to the snout’s top towards the eye. Also sprinkle in a couple of dots between nose and mouth. Then loosely sketch in a few more lines around the cheek, on the forehead, and into the ear.
How to Draw a Dachshund – 1.6: Body Details

We are going to bring out the details in the rest of the dachshund’s body. Because there is a lot going on, I split this up into three separate images and also highlighted everything in read, so that you can see the lines more clearly than my fuzzy pencil strokes.
Look below.


Draw a couple of sketchy lines on the throat, the back, and the chest.
Also bring out the shoulder with as a rounded shape above the leg.
On the leg itself you can emphasize the elbow a little, and draw a very faint vein below it. And don’t forget to add a small claw to each toe.


There isn’t much to do in the middle of the body.
Sketch in these three long lines to bring out the body structure a bit.


And finally add details to the hind end and hind leg.
Draw one line along the top, a few lines to hint at the muscles and bones on the leg, and a claw on each toe.
How to Draw a Dachshund – 1.7: Last Touch

This is the last step.
If you want a male dachshund, draw in the genitals.
If you want a female one, you can add a few teats along the belly.
Then draw in another pair of legs.
Basically you just draw a copy of the leg in the front, and only place it a bit higher and more to the left.
Finally, shade the claws just like the nose. Make them largely black, but leave a thin white stripe free along the top.
And that’s it, your dachshund is complete.
Mine turned out a bit melancholic. How’s your dachshund doing?
Now comes the second part of this lesson where you can see how to draw a dachshund in front view.
How to Draw a Dachshund – Part 2: Front View
2.1: Proportional Outline

Begin with a tall standing rectangle that is half as broad as it is high.
The entire dachshund has to fit into this rectangle, so let it cover almost your entire piece of paper.
Now, take measurement and separate the lower fourth of this rectangle with a straight line from the rest.
Then you take the upper part that is left, and divide it exactly in the middle again.
You now have split the big rectangle into an area for head, torso, and feet.
Divide the entire thing with a vertical line through the middle, and then let’s start drawing in our dog.
How to Draw a Dachshund – 2.2: Head Outline
Now we draw in the head into the two rectangles at the top.
Use the middle line for orientation to draw it symmetrically.
At its broadest point the head reaches a bit beyond the half of each rectangle. The rest of the space is reserved for the ears, which we’ll draw later.
Divide the upper section in half with a horizontal line once more to help you draw the head correctly (blue line below).

The snout is as broad as one third of the entire rectangle’s width.
Draw it in first, and include the lower jaw as a small rounded shape becoming visible at the bottom.
Going up from the snout you have four lines that define the head’s side.
First the lines go up from the snout’s top in a 45° angle for a short while. The next line goes steeper along the side of the cheek and reaches beyond the blue line into the upper half. Now the change in direction goes inwards for the line along the dog’s temple. Make this line a bit longer than the previous two.
Finally, you close the head on top with a rounded line.
Also draw in the neck, making it a bit broader than the snout.
How to Draw a Dachshund – 2.3: Torso Outline

Continuing from the neck the lines slope down towards the shoulders, where they touch the sides of the rectangle.
After the shoulders, very close to the bottom of the middle section, they curve a little bit inwards again.
How to Draw a Dachshund – 2.4: Legs & Feet Outline

The legs are almost as broad as a fourth of the big rectangle’s width. Almost, but not quite. Draw them in, and let the ankle’s stand out as small bulges just above the paws.
You can then draw in the toes as simple ovals with an open top.
Draw only four ovals in a row, because the fifth toe sits a bit above them at the inner side of the leg.
Then add the bottom of the chest as a big curve between the legs.

This is now what your dachshund should roughly look like.
You can make a few corrections if necessary, and then we move on to draw in the details.
How to Draw a Dachshund – 2.5: Head Detail Outline

Draw in the big, flabby ears of the dachshund.
They start at the temple’s top, slope slightly downwards, and reach a bit beyond the edges of the rectangle. They also slightly cross the line at the bottom.
Add the eyes as two circles into the dachshunds face.
Place them on the same level as the transition from cheek to temple, where the lines at the head’s side change direction.
Then put the nose into the middle of the snout. Its front looks like a trapezoid with a curved top. Above it you draw a narrow section for the nose’s upper side.
And now you can erase all the rectangles and guidelines, because we don’t need them anymore.

In red I’ve highlighted a line that runs closely along the edge of the ears.
Draw this one in to make the ears thicker.
Add very small and slightly curved triangles for the eye corners beside the eye-circles. Then outline an “eyebrow” above them. This is not really an eyebrow but a spot with different fur color above the eyes.
The lower part of the dachshund’s face also has a different color than the top. Separate it from the top with a jagged line that starts at the nose and goes straight up from there. Before it reaches eye-level, let this line make a sharp change in direction and go towards the head’s side in a curve.
Draw a small straight line below the nose into the snout’s middle.
Then let two lines bulge into the snout beside the nose.
How to Draw a Dachshund – 2.6: Facial Details

Draw a black circle into each eye for the pupil, but leave a smaller white circle free inside of it for a light reflection.
Then draw many lines radiation outwards from the pupil towards the eye’s edge.
Shade the nose a bit, so that the edges on the top are darker and the brightest part is in the middle. Then fill in the nose’s front with a Grey value and add two black circles for the nostrils into it.
Draw three rows of dots below the nose into each of the snout’s sides.

(Here I highlighted a few lines in red again to improve their visibility, since they were faint on the scan.)
Now it’s time to loosely sketch in a couple of folds and outlines into the face. Draw two pairs of lines on the forehead, outline the eye cavity with lines around the eyes, and add two slightly curved lines in between the eyes.
Then also add the lines in red, but keep them rather subtle.

Sketch folds into the ears, and draw a few lines along their edges.
With that the dachshund’s head is complete, and we continue to loosely bring out the muscle, sinew and bone structure on the other body parts.
How to Draw a Dachshund – 2.7: Neck Details

Elongate the sides of the neck, so that they slightly reach into the torso.
Then sketch in two lines on the throat, and two more lines where the throat transitions into the torso.
How to Draw a Dachshund – 2.8: Torso Details

Emphasize the shoulders rounded shape with a few lines around them.
Also let a line reach a bit into each leg where the side bulges slightly inwards.

Bring out the chest structure by drawing a vertical line into its middle and a curved line along its bottom.
How to Draw a Dachshund – 2.9: Legs & Feet Details

The feet have a different fur color than the legs. Draw a wavy line across the leg to separate them. Then sketch a few lines along the edges of the legs, and draw in two folds above the toes.
Add a small claw to each toe to complete the paws.